Windows 10
Follow these step by step instructions to link your device to YonderTV
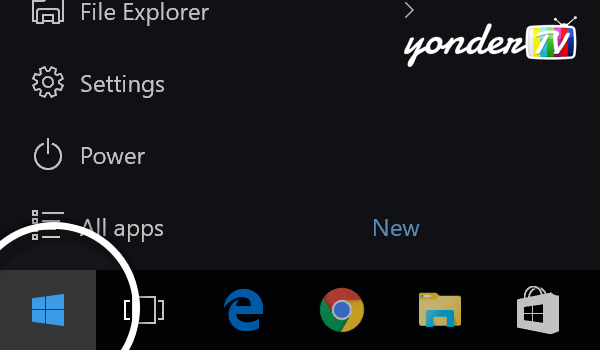
Step 1
Start by clicking the Start button at the bottom left corner of the screen.
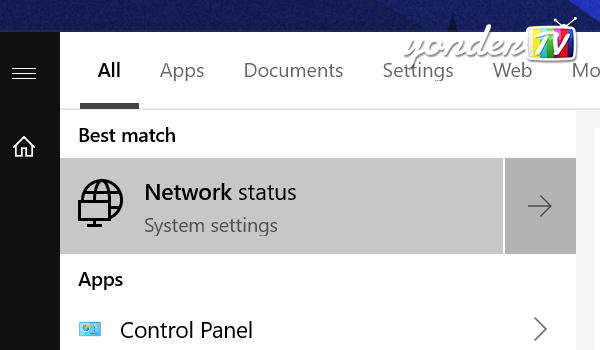
Step 2
Start typing network on your keyboard until the Network Status option shows up in the results, and select that option.
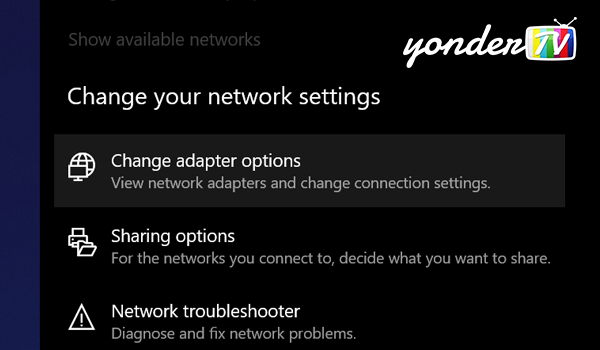
Step 3
Under the Change your network settings heading, click on Change adapter options
Step 4
Depending on how you connect to the internet, select Wi-Fi, or your Local Area Connection (if you are using an Ethernet cable) by right clicking the icon and then select Properties. A new window should open up.
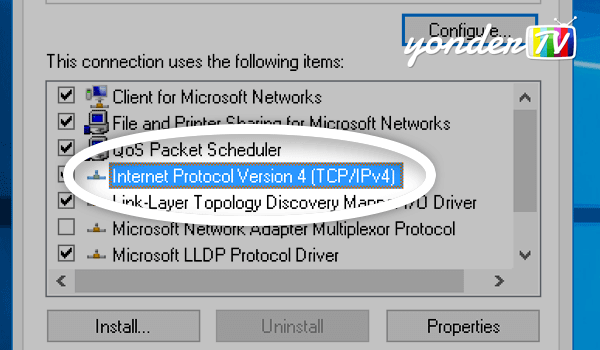
Step 5
In the new window that pops up, select Internet protocol Version 4 (TCP/IPv4).
IMPORTANT: If you see Internet Protocol Version 6 (TCP/IPv6) in the list, make sure to uncheck the box beside it.
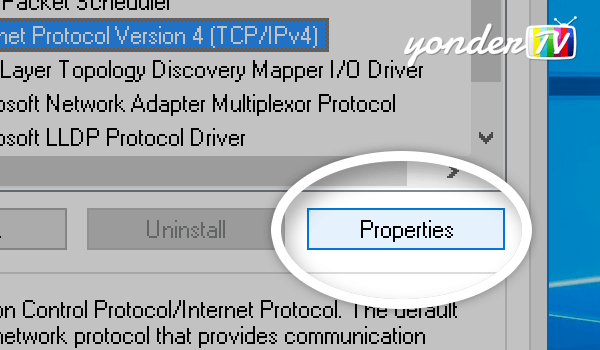
Step 6
From the same window, click the Properties button in the bottom right.
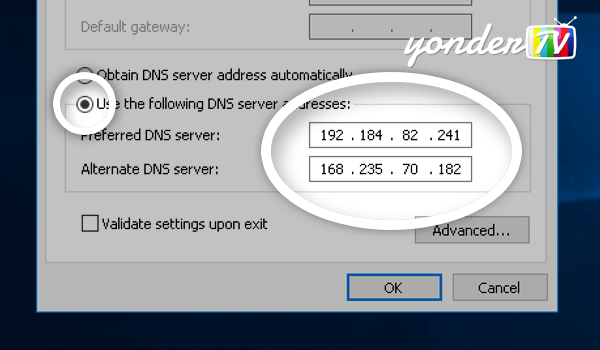
Step 7
A new window should open up. Towards the bottom, click the Use the following DNS server addresses, and enter the YonderTV numbers 192.184.82.241 and 168.235.70.182 as shown.
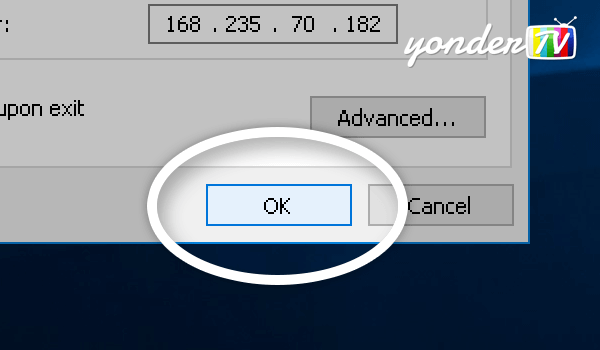
Step 8
Finally, click the OK button, and the Close button on the previously opened window.
Step 9
Next step is important, you have to restart your computer. Pretty simple hey? :)